Advanced Connected Field Service Part 2
- Kyle Hill

- Sep 19, 2018
- 4 min read
Updated: Nov 9, 2019
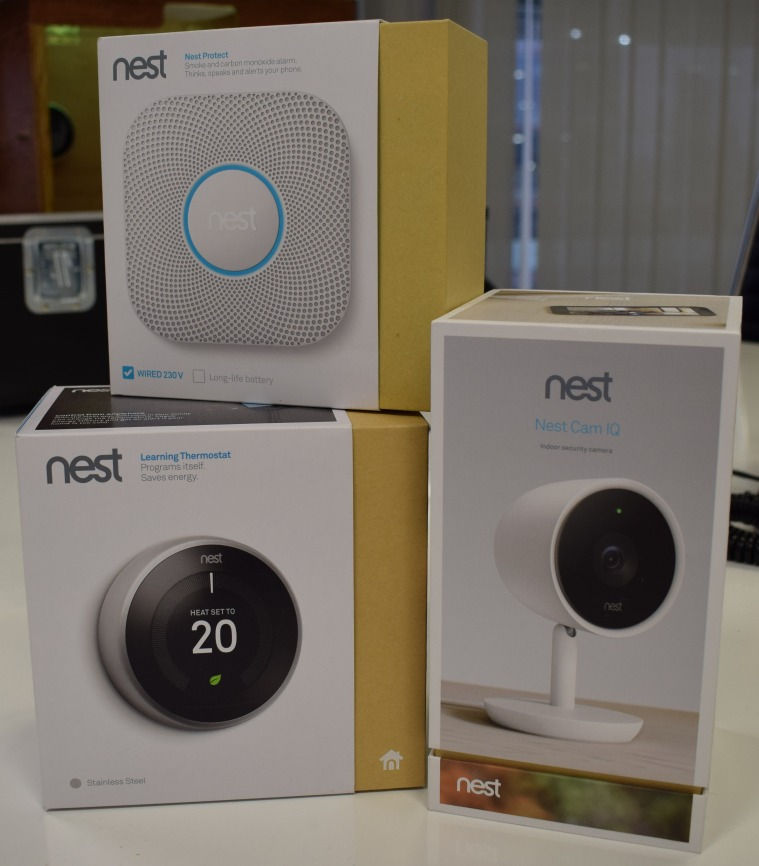
In the previous post, we looked at the fundamental architecture and data flow patterns of the Connected Field Service (CFS) solution. One of the challenges that is obvious to this is that it is designed for devices that natively support Microsoft IoT capabilities and not all devices have actually adopted this. Never fear though, the Azure architecture makes it simple enough for us to achieve our connected scenarios! For the purposes of this scenario, we will be using Google Nest devices.
*To see a list of devices that do support Microsoft IoT capabilities, see here.
The reason for the decision is that the devices are easily available through commercial channels and they are widely adopted in-market so it should represent a valid audience. One other reason is that the scenario will demonstrate just how versatile and capable the CFS solution is with the backing of Azure. Right, on to the good stuff. To start with, let's have a look at how we are going to extend the architectures to allow for us to read the data from the Nest devices. The updated architecture look like this:

And this is the updated architecture which will allow us to send messages back to the Nest device:

*The architectures are available in Visio format here.
From the above, you will see that we have had to make relatively few changes. For the initial pattern where we need to read data in from the Nest devices, we simply create a Web App in Azure and then attach some custom code in a Webjob to connect to the Nest Api and process the messages we receive and then pass them on to the IoT Hub that we already have in place. For ease of use, I have provided a Zip file here that you can just upload into your Webjob. Don't forget to set the 'CRON Expression' field of the Webjob to '*/30 * * * * *'. If you don't follow this step, you will run into Api limits from the Google side and the pattern will stop working. The schedule that we set means that we will receive a message every 30 seconds, so keep this in mind when waiting for messages. I would also recommend turning the'Always On' setting to 'On' so that Azure doesn't unload the Webjobs and the feed to the IoT Hub stops. Azure does this to save some costs on your behalf but in this case it's not the behaviour we want.
You will also need to update the settings on your 'Nest-To-IoTHub' Web App to reflect your Nest access token and device id, your Device Key for the registered device on your IoT Hub, and your IoT Hub so that the pattern works correctly. You can access your Nest token here and the setting on the Web App look like this:

*If you haven't already, you will need to register your Nest devices in Dynamics 365 and I recommend using their Nest Ids as the Device Ids in Dynamics 365. When registering the devices in Dynamics 365, the Device Id will then be used to create the device twin on the IoT Hub with the same Id.
Once the settings have been updated, the last and vitally important step is to update your Stream Analytics job so that it can process the new messages that are being received on the IoT Hub from the Nest devices. This will also require you to update the 'devicerules' blob which is stored in the Blob Storage of your Storage account. The new messages should look something like this:
06/09/2018 11:25:35> Device: [xxx], Data:[{"xxx":{"humidity":40,"locale":"en-GB","temperature_scale":"C","is_using_emergency_heat":false,"has_fan":false,"software_version":"5.8.2-1","has_leaf":false,"where_id":"yyy","device_id":"xxx","name":"Living Room","can_heat":true,"can_cool":false,"target_temperature_c":30.0,"target_temperature_f":86,"target_temperature_high_c":24.0,"target_temperature_high_f":75,"target_temperature_low_c":20.0,"target_temperature_low_f":68,"ambient_temperature_c":23.5,"ambient_temperature_f":74,"away_temperature_high_c":24.0,"away_temperature_high_f":76,"away_temperature_low_c":9.0,"away_temperature_low_f":49,"eco_temperature_high_c":24.0,"eco_temperature_high_f":76,"eco_temperature_low_c":9.0,"eco_temperature_low_f":49,"is_locked":false,"locked_temp_min_c":20.0,"locked_temp_min_f":68,"locked_temp_max_c":22.0,"locked_temp_max_f":72,"sunlight_correction_active":false,"sunlight_correction_enabled":true,"structure_id":yyy","fan_timer_active":false,"fan_timer_timeout":"1970-01-01T00:00:00.000Z","fan_timer_duration":15,"previous_hvac_mode":"","hvac_mode":"heat","time_to_target":"~0","time_to_target_training":"ready","where_name":"Living Room","label":"","name_long":"Living Room Thermostat","is_online":true,"last_connection":"2018-09-06T10:22:00.179Z","hvac_state":"heating"}}]
*A great tool for checking what messages are actually being received on your IoT Hub is the Device Explorer application available here.
**The updated 'devicerules' blob and Stream Analytics job are available here.
Based on your 'devicerules' that you have setup, adjust the target temperature on your Nest Thermostat and you should see the resulting IoT Alert generate in Dynamics 365! Awesome. Now that was the easy part. Now we are going to look at the second architecture diagram which shows how we can send a message from Dynamics 365 to a Nest device. One way that we could do this is directly to the Nest Api but this would negate the CFS pattern and we would lose sight of what interactions we are having with the devices. Just to highlight the direct pattern, you could develop an HTML Web Resource like this which would manipulate the device directly:

As mentioned, we will be looking at achieving this through the CFS pattern rather so we will be making use of the IoT Device Commands from Dynamics 365. The first step we need to accomplish is creating a new Service Endpoint 'IoT Nest Message' in the Dynamics 365 instance that will allow us to create a plugin that creates a message that will be placed on the appropriate Service Bus Queue 'hsukaeccfs-nest'. Once this is achieved, we need to create a Logic App 'CRM-To-Nest' that will process the queued message and relay it to the Nest Api. This Logic App will also need a custom Azure Function that will help us connect to the Nest Api. Once the function is created, your Logic App will look something like this:
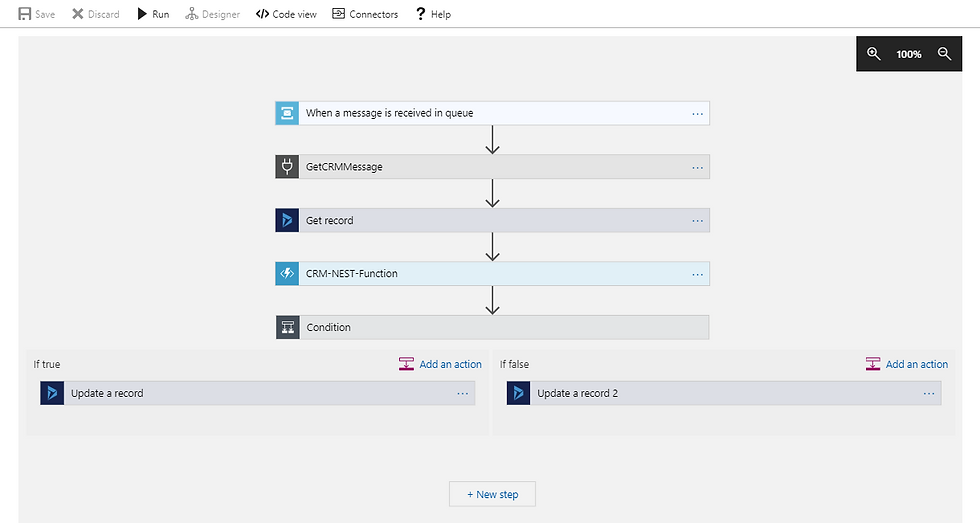
Once that is in place, the last step as you can see from the Logic App is to update the IoT Device Command in Dynamics 365 with the result of the operation. And there you have it, a complete pattern to include third party devices into your CFS solution. The IoT Alert in Dynamics 365 should look like this:

*A couple of things to be aware of include that this is not a production ready solution for third party devices, but rather a demonstration of one possibility. There are specialist devices and partners that have Azure IoT approved devices and these really do make things a lot easier but just in case those won't work for you, the above gives you an idea of how you could incorporate things into your CFS solution. Here is the video of the solution in action:
Lookout for the next post where we will look at doing some things with the video feed from the Nest camera!
Comments